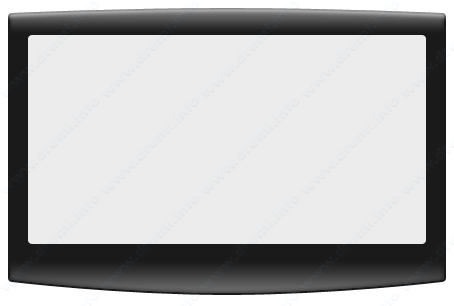
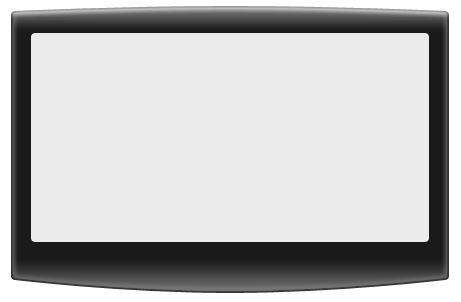
Hi brother ! this tutorial will explain about how to create an illustration for my new Samsung Monitor, SyncMaster 933SN series. Follow my steps, and enjoy my tutorial.
First is create your new Photoshop document. The size is up to you brother !
Step 1
Use shapping tool to grab a rectangle as your base screen of monitor. Take look my setting:
and I use #1a1a1a as base color. Give name for your shapping as “base”
Step 2
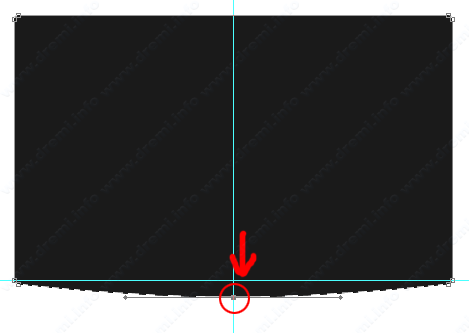
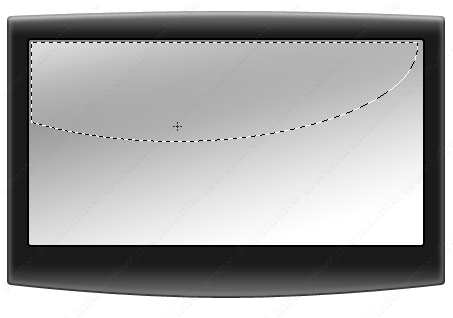
Select base path using Direct Selection Tool, and activate Add Anchor Point Tool. We will modify the bottom side of base shapping.
Now click one at the center of bottom side of base path. Move it to down side, approximately 30px.
Step 3
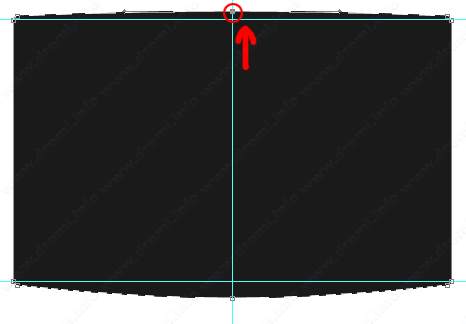
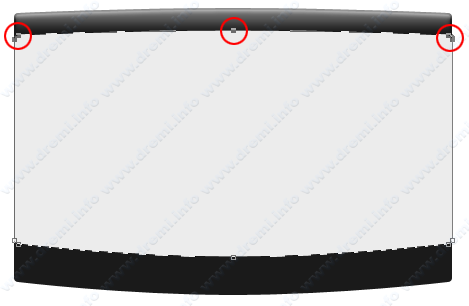
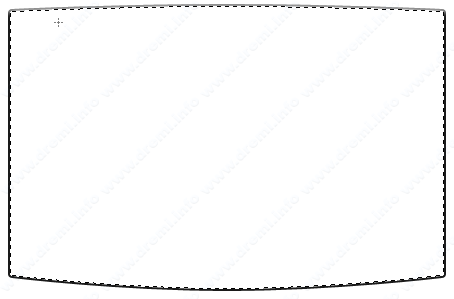
Repeat Step 2 for top side of base path. But on this step, move new anchor to up side, approximately 10px – 15px. The result showed on this screen shoot:
Step 4
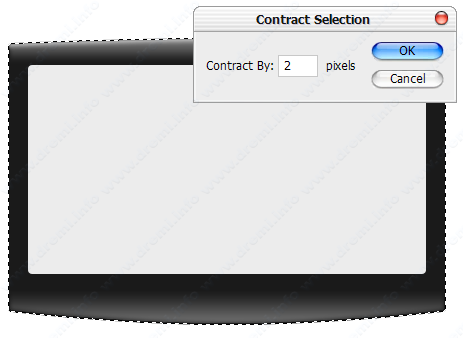
Now press [CTRL+Click] at base path layer and activate Selection Tool with Intersect With Selection option. Select about 50px of your current selection area. You will get new selection.
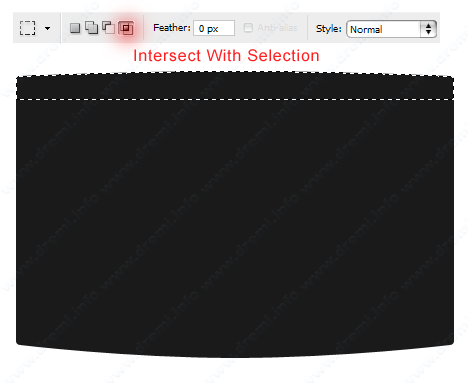
Then chose menu Select > Modify > Contract : 2px, fill selection area with color #5e5e5e. Create new layer then change layer name as “top-shadow”.
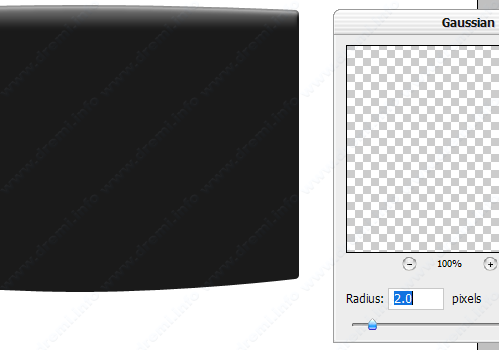
Go to Menu Filter > Blur > Gaussian Blur. Give it about 2px.

Let’s change blending option of top-shadow layer to Screen.
Step 5
Press [CTRL+Click] again on base path to make a selection area, create new layer called as “top-line”. Chose menu Select > Modify > Contract : 2px. Fill selection area with color #ffffff.
Still on selection area, now move selection area to down side, it’s about 2px. Then hit [DELETE] button. You will see a line at top side of base path. Give it Gaussian Blur about 2px.
Step 6
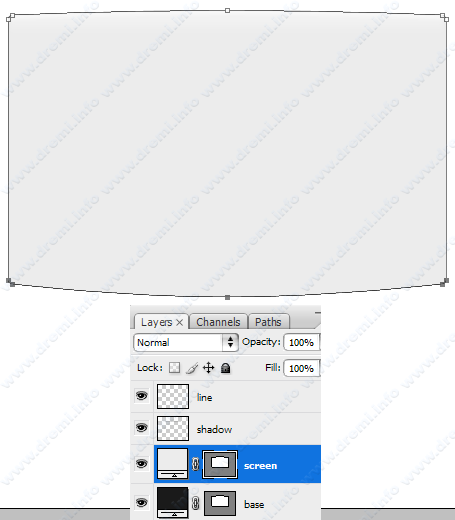
Now duplicate your base path as screen layer, don’t forget to change screen shapping color to #ffffff.
Activate Direct Selection Tool. We wil make screen path smaller than base path.
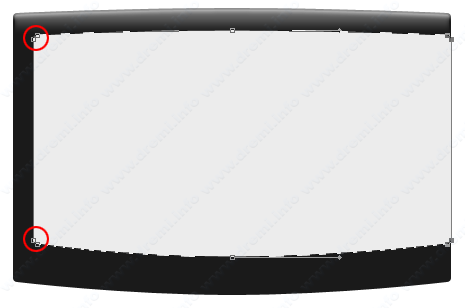
Use Direct Selection Tool to select all anchor point at the bottom side if screen path. Then move it to top side. Like showed on this screenshoot:
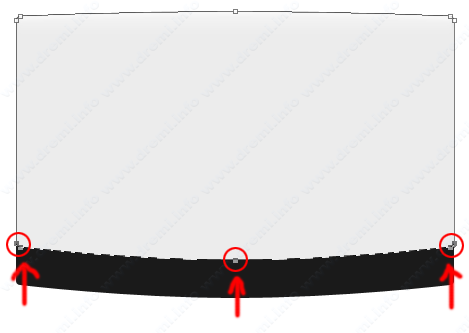
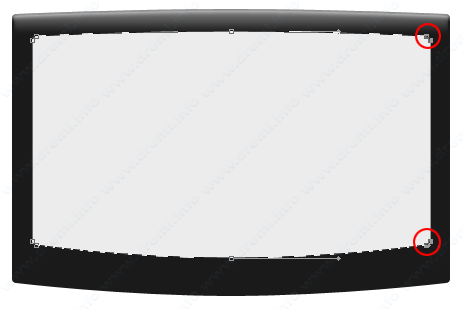
Select another anchor point and move it to inside.
Step 7
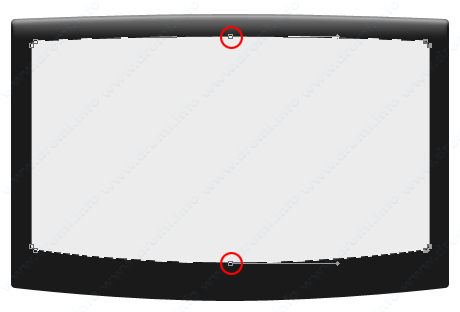
Ouke, now delete two anchor point that located on top side and bottom side of screen path. Use Delete Anchor Point Tool to delete it.
Step 8
Repeat Step 4 to create bottom-shadow of base path
Step 9
Now press [CTRL+Click] again on base path, then chose Selection > Contract 2px. Fill selection area with color #ffffff.
Chose Selection > Contract again, and give 1px. Hit [DELETE] button. You will see stroke line inside of base path.
Chose Filter > Blur > Gaussian Blur 2px. Change blending option of layer as screen.
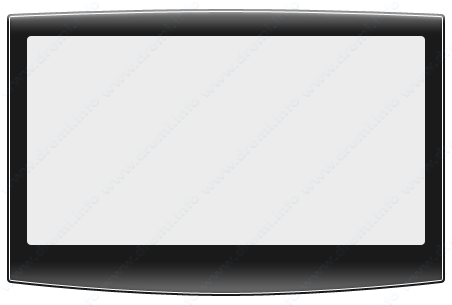
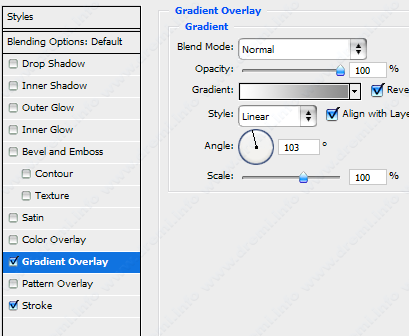
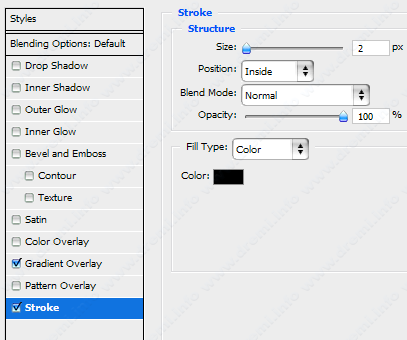
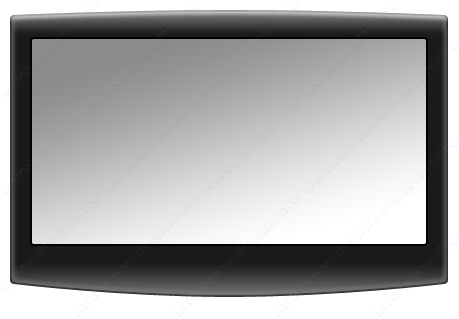
Untill this step, let’s review your design. Hmm…. not so bad 🙂 but to make better screen, add some layer style for screen layer.
Nice ! 🙂
Then add a glossy effect for screen using transparent gradient.
Step 10
Ouke! let’s illustrate a transparent glasses at the bottom of base and screen layer.
You may duplicate base path, and make it looks likely this screenshoot:

I give name of this path as “bottom-glasses”. Now duplicate bottom-glasses and move it to top about 5px

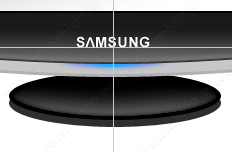
Step 11
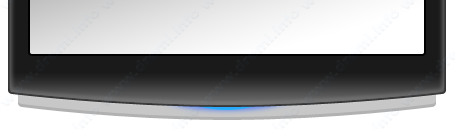
I use gaussian blur to create blue light at the bottom of base path
Step 12
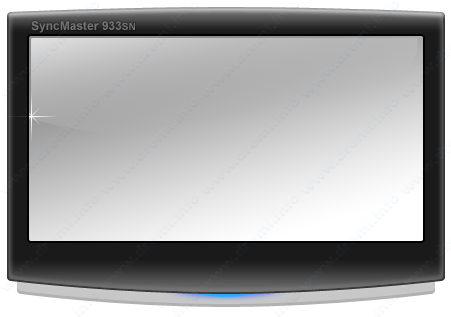
Create a text for “SyncMaster 933SN” then add stroke layer style for 1px with color #000000.
To make a little bit of shiny effect. I create a star using 1px vertical and horizontal selection or you may use brush tool.
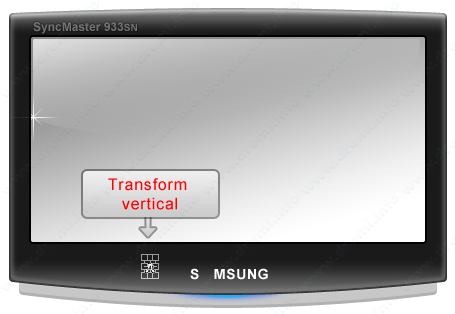
Step 13
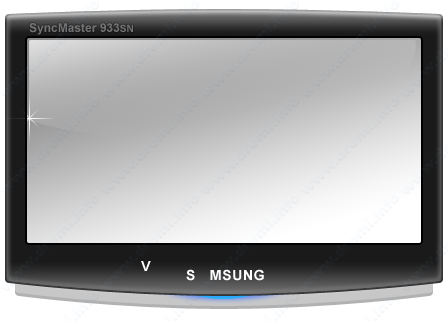
Add a text for “S MSUNG”. Note: I use “V” text and transform vertical it to get the real SAMSUNG text
Take look this screen shoot.
Step 14
We will create elipse to complete our monitor 🙂
Use Elipse Tool then grab it with color #1a1a1a

Change layer name as “bottom-elipse”
Repeat Step 4 to create shadow
Step 15
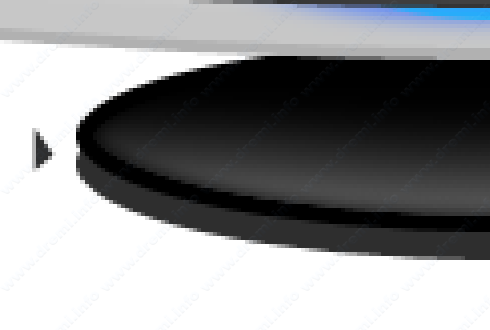
Duplicate bottom-elipse, move it to down side about 15px
Look at left and right side of elipse, looks likely not perfect. So, use poligon lasso tool, to make it perfect.
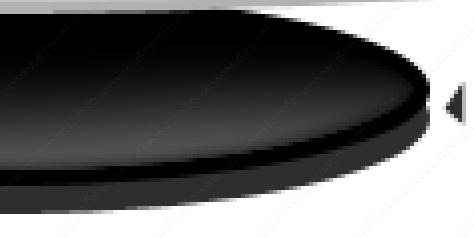
Good ! looks likely perfect!
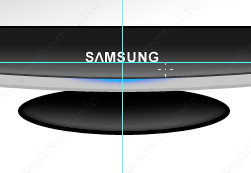
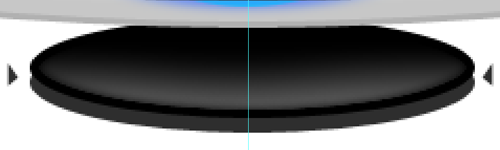
Step 16
Create once again for elipse at center of bottom-elipse. Then add rounded rectangle between bottom-elipse and bottom-glasses.
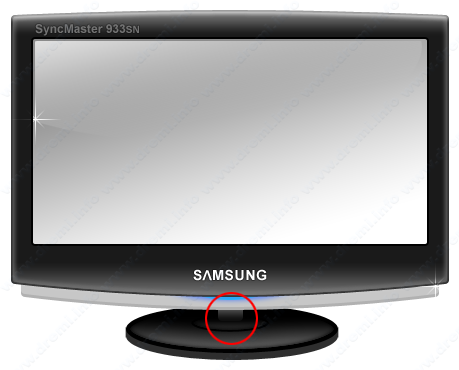
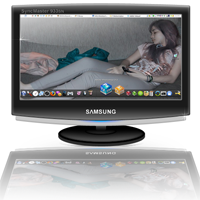
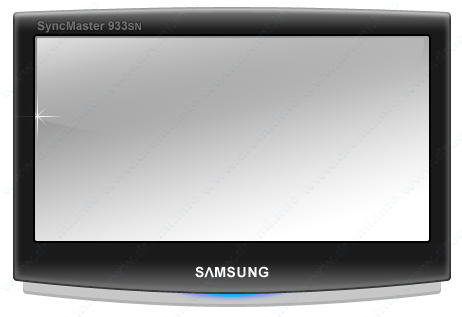
Good job ! now you has finished to illustrate Samsung Monitor – SyncMaster 933SN Series.
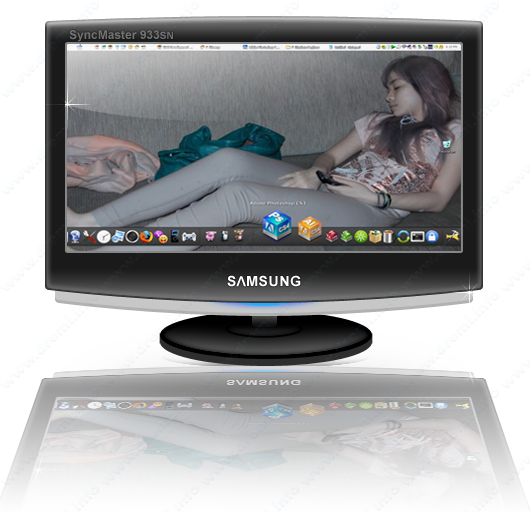
You may add you desktop screenshoot into screen. Take look this one!
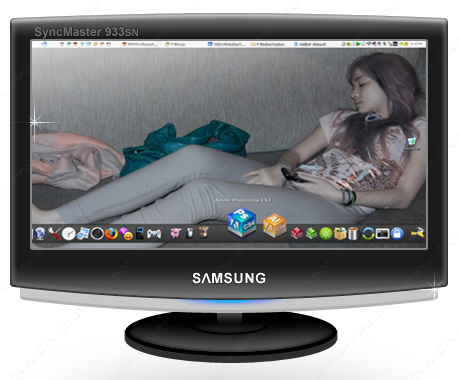
And add reflection effect to make it cool illustration
Thank for read my tutorial.
menjurus nih gambarnya….wwkkwkw ;p
nice tutorial dok ! 😀
Nice job ..doc:-bd
I don’t like the reflection!
I don’t like the reflection!
good! i like it..
good! i like it..
that’s nice bro,..glosy technique
that’s nice bro,..glosy technique
Wow You are the god of photoshop 😉
Wow You are the god of photoshop 😉
@Kevin-K
hi kevin! are you C01N ?
sory for my bad …. hehehehe…
@Kevin-K
hi kevin! are you C01N ?
sory for my bad …. hehehehe…
wah keren om..
wah keren om..
nice tutorial…… thanks alot….
@Ato
Welcome 🙂
nice tutorial…… thanks alot….
@Ato
Welcome 🙂
Kerend bro . .
WallpapernYa juGa mantafff . . .
😀
Kerend bro . .
WallpapernYa juGa mantafff . . .
😀
@Arie CS
mau lu ?
kakakakkwkwkwkwww
tutornya keren….
yang bikin pasti lebih keren….
keren lagi wallpapernya…. hehehe
sory mas, just kidding…
@sofyan
hehe, mau wallpapernya ? punya banyak kok wkkwkwkwkw
tutornya keren….
yang bikin pasti lebih keren….
keren lagi wallpapernya…. hehehe
sory mas, just kidding…
@sofyan
hehe, mau wallpapernya ? punya banyak kok wkkwkwkwkw
Wouw, great
Nice tutorial Dr.Emi
I will try It
Wouw, great
Nice tutorial Dr.Emi
I will try It
coba pake bhs indonesia, kayaknya lebih bagus tuh! sorry! bhs inggris gue payah
coba pake bhs indonesia, kayaknya lebih bagus tuh! sorry! bhs inggris gue payah
tutorial nya bagus, terutama saya suka teknik adobe photoshopnya, untuk pemula sangat membantu… trims Dr. Emi
tutorial nya bagus, terutama saya suka teknik adobe photoshopnya, untuk pemula sangat membantu… trims Dr. Emi
mkasi ya Dr.emi…. i like it!@!212
mkasi ya Dr.emi…. i like it!@!212