woke !! Dear my beloved fans, this is for you. tutorial how to make a propeller on a CPU Fan, inspired by my new CPU case :))
Art creations are increasingly lacking, I myself have been getting a lot of inspiration myself recently, one of which is from my new casing Simbadda SimCool 802. A few days before Eid, my power supply has a problem, well as I have money just changed with the casing, so that air circulation and my CPU performance is getting better …
as usual, I don’t buy new clothes / clothes every time of Eid, finally I just add memory to my beloved PC, true friends when it’s hard and happy. …
Alhamdulillah, the post-Eid project is not bad, both from the office and from the stand alone corner Dr.emi creative design (mypsd2cms.com) himself, fortune comes in turns, this month’s adsense has increased drastically … I estimate, maybe because of My new blog is at psdremi.co.cc, which has entered the good-tutorials.com directory and some of my new blogs that speak English are different. Cheer up !!!
woke !! Dear my beloved fans, this is for you. tutorial how to make a propeller on a CPU Fan, inspired by my new CPU case :))
Hot tea or coffee, Star Mild cigarette suction makes me have fun this afternoon …
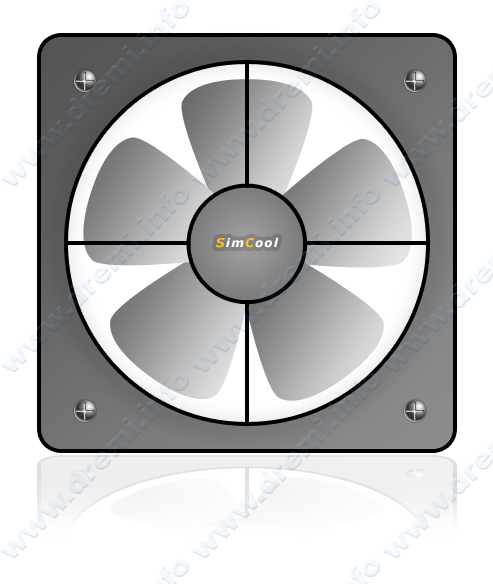
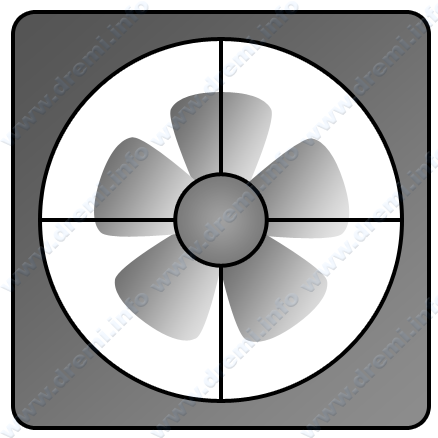
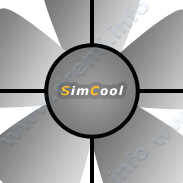
This is the final result
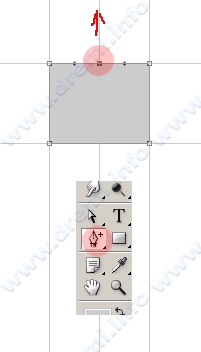
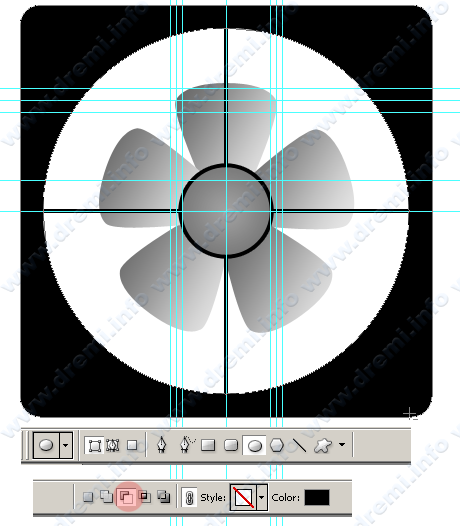
make a new document size 600 x 600 pixels …
take the rectangle marquee tool selection, make a selection with a fixed size of 100 x 80 px

From there, you can drag a guide line … around the selection rectangle that you form
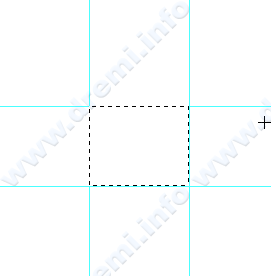
press [CTRL + D] and prepare your shape tool.
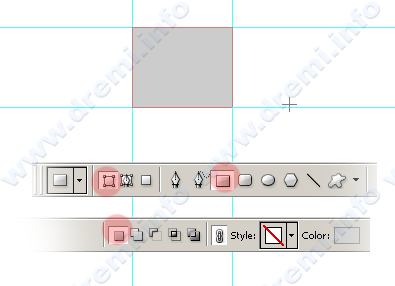
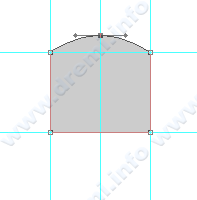
Use the rectangle tool, make it the size of the guide line …
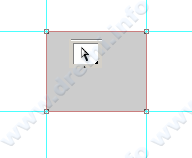
rename layerna to fan. prepare the direct selection tool
Click on the fan shape, so a path point will appear.
Switch to the add anchor point tool, click once on the top edge of the rectangle shape, and drag it over the point that appears na
this is the result
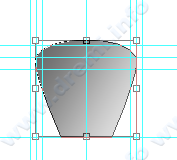
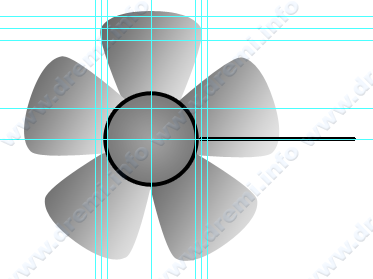
pay attention to the bottom left and right right square path points, drag inwards, let the perspective form
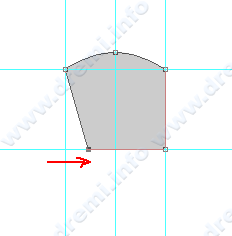
Next, use the convert point tool, drag it to the side to bend the diagonal end of the fan
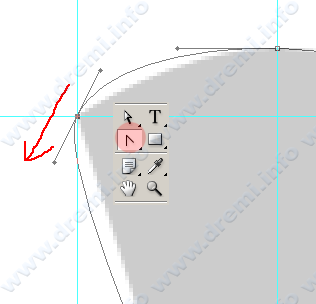
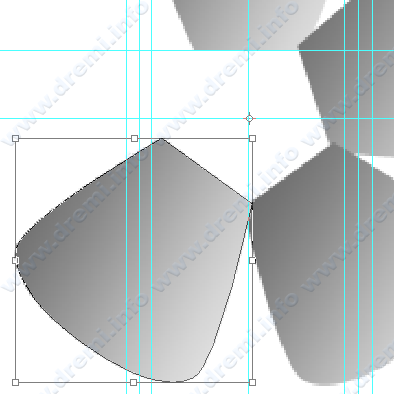
do the same on the other end
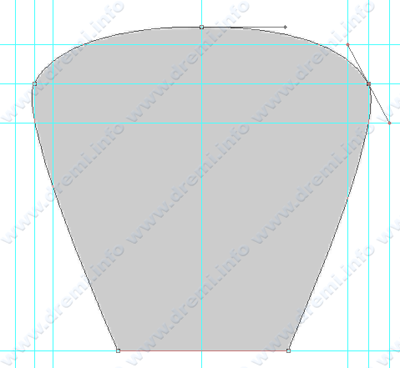
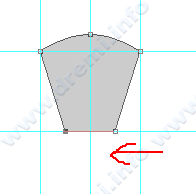
use guide line to help the direction of the proportional curve point
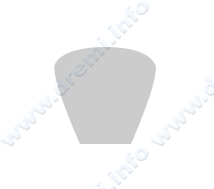
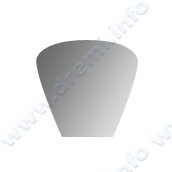
I guess if at normal size, it will be like this:
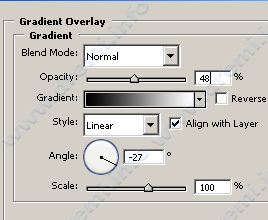
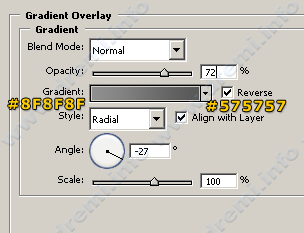
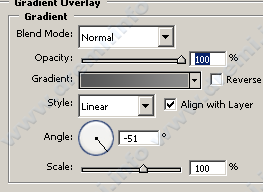
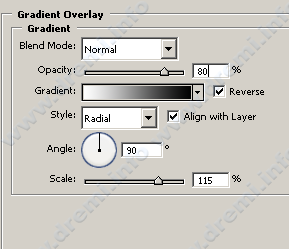
select menu layer> layer style> gradient overlay to fill the gradient overlay fan
duplicate fan layer by pressing [CTRL + J]. Then press [CTRL + T] again to transform the duplicate fan layer object
Drag the center of the transform, about 30 px below the fan copy object, so that the transform will be centered at the bottom of the fan object.
transform angle na becomes 72 degrees to the right … If you’ve hit the [ENTER] button 2x

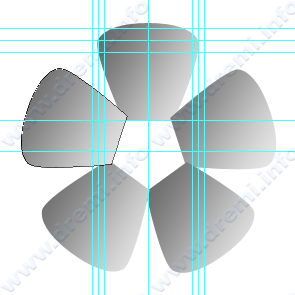
Repeat the steps above to create another fan until 5 fans are created
Note: I got the angle of 72 degrees from 360 degrees divided by 5 fans = 72 degrees
take the ellipse tool to create a new ellipse shape, right in the middle of the fan object
put the mouse pointer in the middle of the fan object, tros while pressing [ALT + SHIFT] drag it out to create an ellipse shape, name the layer dynamo
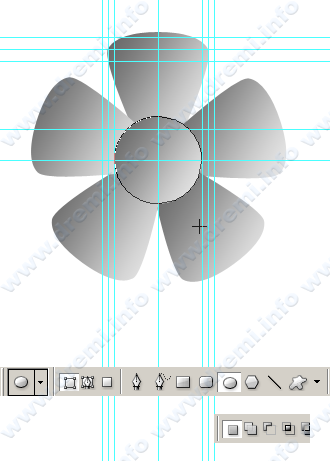
change its layer style
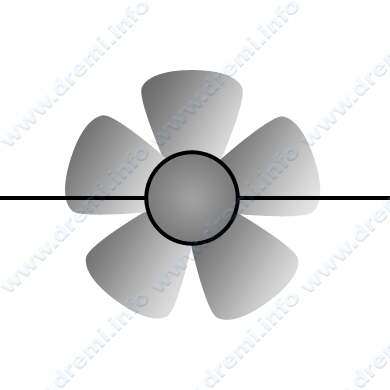
prepare a pencil tool, black, measuring 4px
draw the first straight line to the right …
Give the layer name, dynamo-line
duplicate to the left with the aligned position
You can block both layers (dynamo-fan and dynamo-fan copy) or merge them both with [CTRL + E]
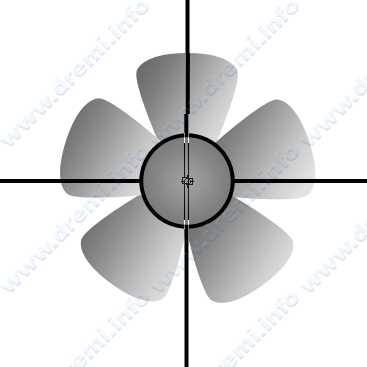
after that you duplicate both of them and transform together 90 degrees to the right
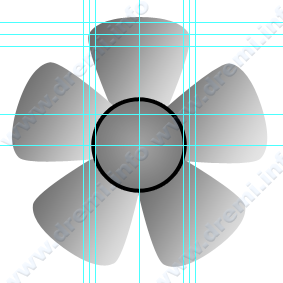
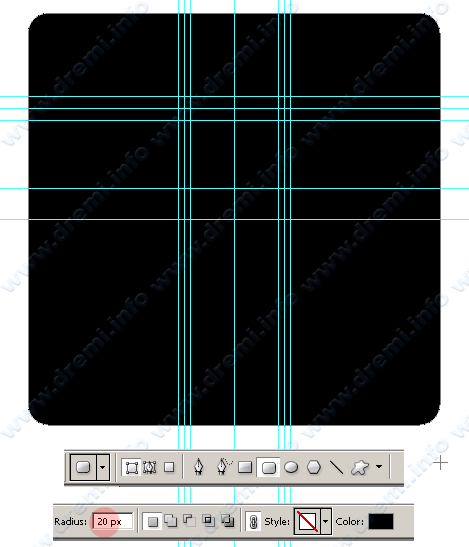
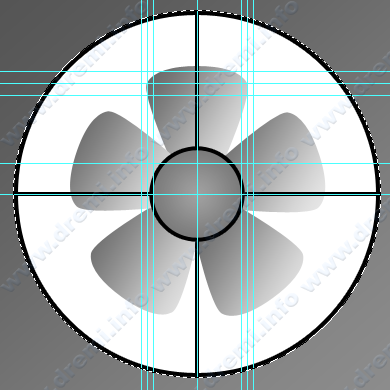
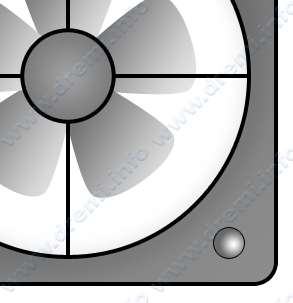
Continue to the frame for the fan, take the rounded rectangle tool, with a radius of 20px. Under the rectangular object that is centered in the middle of the dynamo object, it covers all other objects as well
prepare the ellipse tool to cut the fan frame shape. Dlu change the na shape settings to subtract and make the ellipse field right in the middle of na too
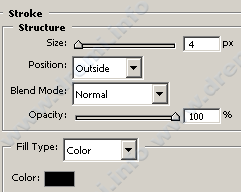
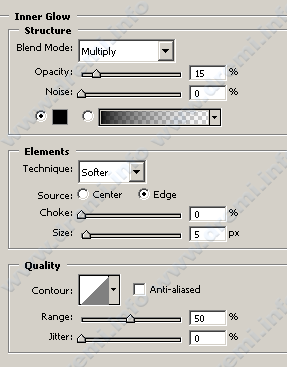
Add the same gradient overlay as the fan layer, just add a 4px stroke
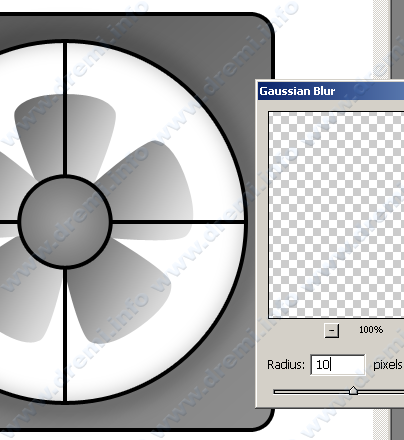
For a shadow effect, add a blurred object around the circle of the fan frame, using the elliptical maquee tool
Change the forground color to black, select Edit> Stroke, give a stroke value of 10px or enough
Deselect the selection area by pressing [CTRL + D], rename the layer to dark-shadow
Select menu Filter> Blur> Gaussian Blur, give a radius of 10px
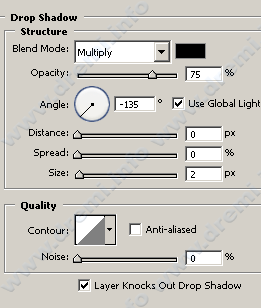
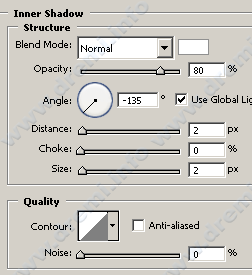
now we make a screw na, under the new ellipse shape in the right corner under the fan frame. rename the layer na screw
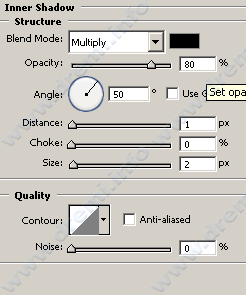
give the style to this:
Also make a plus (+) cross for the na screw, enlarge the screw object, take the rectangle marquee tool. make a vertical rectangle in the middle of the screw. and give white, as well as the horizontal rectangle na
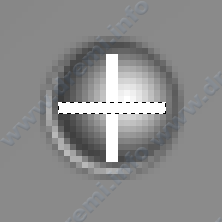
Merge both rectangles, and style them a bit:

group screw and cross layer plus na into layer group set “screw” and duplicate the na group. place the duplicate na on the upper left of the fan frame.
block the second layer set, and transform it to the right 90 degrees
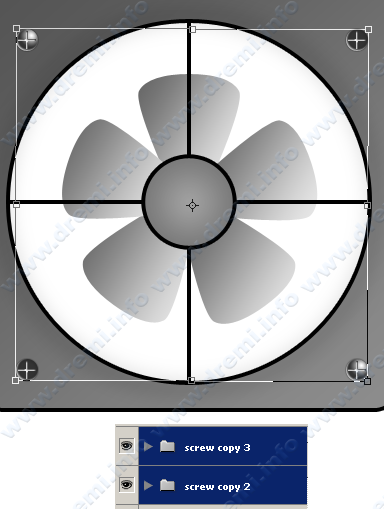
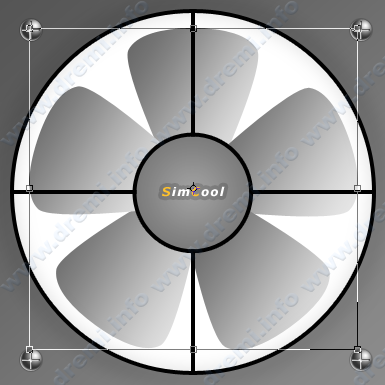
make SimCool text, in the center of the dynamo object
for the fan and the frame it’s finished, but the size of the fan is not suitable, finally I got bigger with free transformation on all fan and dynamo objects
now the hidden background layer na, press [CTRL + A] and select Edit menu> Copy Merge. when we create na reflection effect
paste it in a new layer, transform it vertically, and slide it down!
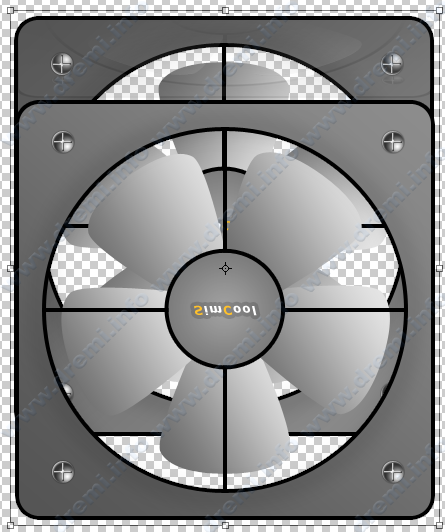
You can show the background layer again, and reduce the result of the object that you pasted, here I delete the more naughty part and reduce the opacity of the reflection layer to 12%, so it looks better the reflection effect na
setuju !!! gw stuju banged ama pernyataan terakhir lu !
photoshop indonesia memang harus mampu bersaing, baik dari segi tutorial maupun karya design na 🙂
masa dari taon ke taon yang diubek ubek epek2 molo… sekali kali donk mbikin karya seni yang brilliant !!
eh bro ! kalo di animasiin ke na seru tuh baling baling na :))
keren, tutorial na keren. hihi… thanks dok !
keren juga nih tutorial photoshop na, gw jadiin wallpaper kyaknya cocok nih :))
mas tutorial nya mantebs smua, awalnya kirain dremi.info cuma photoshop isinya, ternyata ada yg laen lagi, php nya juga ada di forum.
mau tanya, itu kan make ada semacam tanda merah muda transparent bwat petunjuk di screen shoot nya, gimana cara bikin nya mas ? saya pernah bikin tapi lagi lagi make seleksi molo, kan susah mas kalo banyak, dijawab ya mas :)) thanks brat tuts nya dr.emi
thanks !
itu caranya, make tool brush, pilih warna merah, lalu kurangi settingan opacity di brush nya. wabis ntu lu tinggal klik klik di daerah mana yang lu kehendaki, jangan atur ikuran brush nya juga
woke !
unik juga 🙂 kreatif !
wahh….tutorialnya bagusssssssssss….
Masssssss mangstab juga. boleh kopi kan buat ngisi web q.
@dedi
usaha saja, itu lebih baik dari pada kopi paste.
atau alternative lain adalah kamu mengulas / mencoba sendiri tutorial nya dengan materi yang sama, tapi di presentasikan oleh lu sndiri tanpa ada embel2 kopipaste dari web guwe.
Thanks
muantap jaya..
mr masuk ke dkv diunikom kira-2 pa ya yg harus dipersiapkan
waaaaah
hebat banget cee……
upload truz tutorial yg kren ya,,,,
heehee,,, ktagihan nhe
tutorial
@azwir OK